

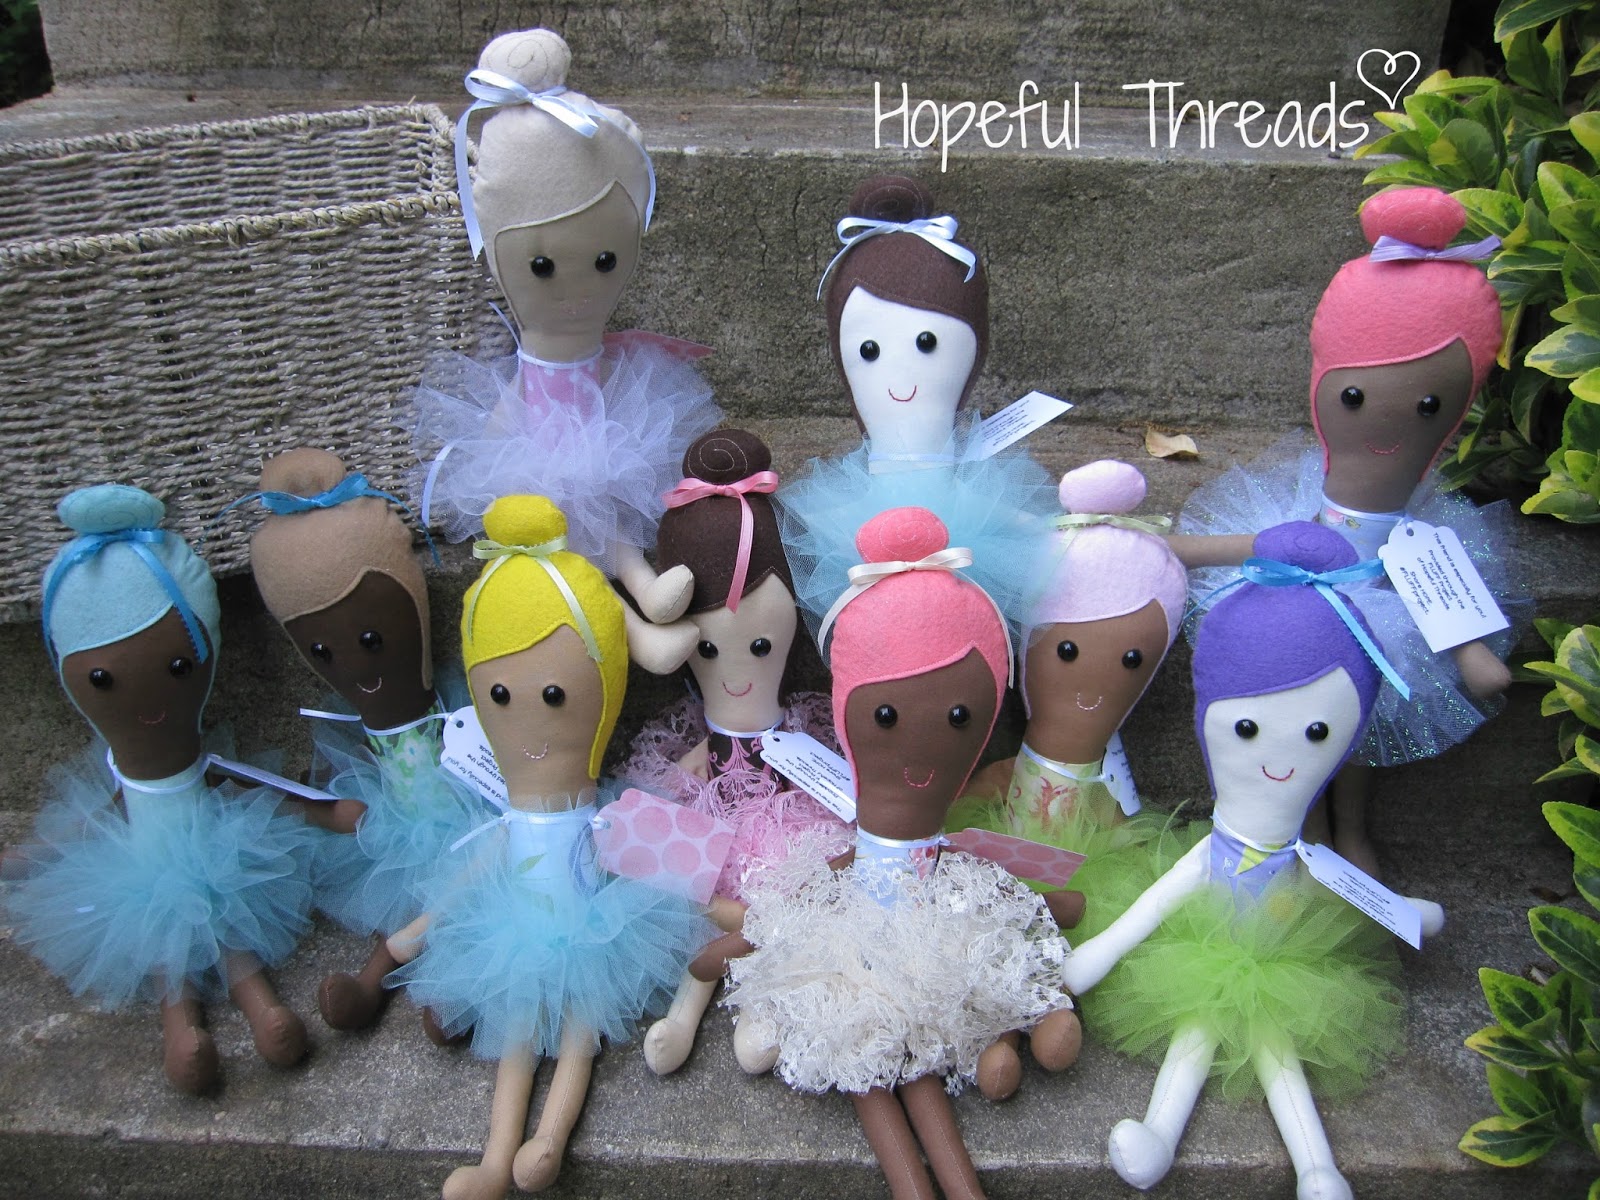
These lovely girls have been in the works for quite a while!
I tend to sew in "batches" when I'm working on items to donate, and sometimes....well, sometimes, I end up on a roll while I'm cutting and lose count on how much I'm going to have to sew. That kinda happened with these girls, so it has taken a bit of time to finish them, but I am tickled with how they've turned out!

Each one has it's very own style and personality!
This is the Nora Ballerina pattern from Blue Whimsy.
I entered a giveaway that she had going on, knowing that these sweet girls would be perfect for our FLUFF Project. Before the giveaway was even over, she contacted me and told me that after reading about the FLUFF Project, she would like to offer me any pattern of my choice from her shop! Her kindness and generosity really touched me and I was so excited to get to sew this sweet pattern!

These are the ones that will be donated....
And these I will be offering for sale to help off set the cost of time & materials...

You can find the ones available for purchase HERE!
The pattern also includes sweet little felt ballet slippers, but I chose not to add those due to the likelihood of them getting lost while in the donation shuffle.
The pattern also includes sweet little felt ballet slippers, but I chose not to add those due to the likelihood of them getting lost while in the donation shuffle.
The tutus are absolutely my favorite part!!!! They fluff up so darling!
This was a really fun pattern to sew! I loved watching them come to life through the process.
I made a simple change to the final assembly of the doll to make turning easier for me. The original opening for turning is on the dolls back, as you'll be able to see in one of the below pictures. However, I think I made my openings too small, and I struggled to get my first doll turned. And since I sew each step in an assembly line fashion when batch sewing, that meant they were all like this. So, here's what I did as an alternate way to finish....in case you find yourself in the same predicament! ;)


Adjusting the needle to the side, stitch 01 in the image, allows for an easier and more precise stitch along the edge. I used this stitch for much of my dolls assembly.

I attached the arms, and then sandwiched them inside the 2 body pieces, sewing from one bottom edge to the other, leaving the bottom open and legs unattached.


After trimming and turning the body, I turned under and ironed the bottom edge and pinned the legs in place.


After sewing in place, I was then able to stuff the doll from the original opening in the back.


This is a lovely pattern, one I definitely will sew again! The dolls are already drawing quite a bit of attention from all my friends and family who have seen them!
You can find Blue Whimsy in all your favorite places....
Oh....and if you'd like to try one of her patterns for FREE, she has a darling little mermaid pattern HERE so you can! :)
Be sure to tell her you saw her sweet pattern here when you drop by to check out all her other sewing sweetness, so she knows just how much I appreciate her generosity!

2 comments:
Those are SO fabulous. Is it tricky working with the tulle/lace for the skirts? That's what kept me from jumping on the pattern, not wanting to get all annoyed by the lacey stuff!
I am planning (have fabrics chosen and set aside) to make the mermaid for my next round of Fluff items (just need to close up the bacons I made then I can start mermaids). The mermaid seems a little less involved. I also have her elf patterns that I want to whip up in time for christmas.
These are just adorable, Kristy!!! You are going to make several girls very happy.
Post a Comment