Sunday, June 30, 2013

June 2013 - FAMILY Project Finale & Reminder


I have had a great month sewing for my family and hope you have too! 
I of course didn't finish anywhere near what I had hoped, but I did get a lot done and hopefully can continue to chip away at the list of wishes and requests. 

I did accomplish something pretty significant though and at least STARTED by very first quilt! I'm super excited and can't wait to share the finish with you all when I get it all done. The kids are already loving it! (so much for being a surprise for them!) :)

I also wanted to offer a quick reminder for those that follow Hopeful Threads via GFC-Google Friend Connect or Feedburner.....changes are coming to these services, beginning 7/1/13, so to be sure that you stay connected to all the fun around here, be sure to check out the other options for following all the posts and updates....

Follow on Bloglovin
 Super post here on how to make the switch to bloglovin' and easily transfer all your favorite blogs from Google Friend Connect.


Pinterest
Follow Me on Pinterest

Twitter

Networked Blogs - Hopeful Threads

And watch this week for the JULY Project announcement!
Another meaningful sewing project ahead. :)
Photobucket

Saturday, June 29, 2013

Comfy & Reversible Carseat Strap Covers Tutorial


I recently bought a set of carseat strap covers for my Lil' Man. They were cute, but, poorly designed for their purpose. They velcro around the carseat straps and when doing so, leave a large corner of the scratchy hook exposed to rub against my little one's neck. Far worse than the strap itself. So....I decided to just make him some that I could add a snap closure to, therefore avoiding any possible irritability. Now, I'm sharing the tutorial with you in case you'd like to make some as well. :)

Here's what you'll need:
A rectangle template approximately 6.75" x 6.5" with rounded corners.
Fabric scraps for backing and print outer.
Batting or fleece scrap.
Bias trim or Fold-Over-Elastic for binding.
Snaps for closure.

Using your template, cut 2 of each, backing, batting and outer fabric.

Sandwich the batting between your outer and backing fabrics, with right side of fabrics facing out. Pin in place and baste stitch all the way around the outer edge.

 Trim around the edges to even as needed. 
 Carefully pin the open binding in place as seen below, folding down the edge about 1/2" at the beginning.
Sew along the seam of the binding all the way around. 

Fold the binding over the raw edges of your strap cover and carefully top-stitch in place.

Your strap covers will be reversible when finished as well! This is especially nice if you have a slobbery little teether like we do. :)

Add your snaps evenly on each side, and your done!

Ready to wrap them snuggly and comfy around your Little One's carseat straps!

My big kids have decided they need a bigger version of these for themselves...sooooo..... :)

Hope it's helpful for some of you!
Photobucket

Monday, June 24, 2013

Pattern Review- Super Doll by Butterbeans & Chicpeas

 This was one SUPER fun FAMILY project!!!!

This is the incredibly sweet Super Doll from Butterbeans & Chicpeas. I first learned of this pattern from Dona over at Sewing Miles of Smiles. She has used it a lot for her donations to her Children's Hospital, and also sent a bundle of them for our April Project that were a big hit! So, when I contacted Bev at Butterbeans & Chicpeas and shared that our FLUFF Project would be an ongoing project at Hopeful Threads, to give back to children in foster care, she sent this sweet guy over for me to sew. Thanks again Bev! I love him and know the children who receive him will too. 

  
This easy-to-follow PDF pattern includes step-by-step photos along with written instructions for assembly, making it a snap to create. His face and hair are cut from felt for a quick and durable applique style face. Just gotta LOVE that crooked grin, and he OF COURSE has a cape too!
  You can play around with mixing and matching your fabrics so that each doll you create is truly unique. Favorite colors or characters are sure to make him a best friend for his little owner too. 

The only modification I made while sewing was the way I attached the legs. The instructions provide the most common way to do this, but after sewing the Ruby Lou doll, I now use the technique provided in that pattern when attaching legs on all my dolls. Much less fiddly. 

I used Safety Eyes on all of mine but one. The one on the left below shows the doll made using plastic KAM snaps for the eyes. I've been wanting to experiment with this for a while and though I do prefer the safety eyes, think it still turned out cute with the snaps. Alternately,  you cold use felt cut-outs or embroidery for the eyes, which would make him safe for all ages. 
 I made a few of these this round! :) One for my own SUPER fella, at least one will go in the box for the FLUFF Project, and one for donation to a special upcoming fundraising auction.

Super Doll flying his way into the heart of a very special child!

And if you aren't yet familiar with the FLUFF Project, be sure and take a minute to read more here. Thanks too, for checking it out!

SUMMARY
Sewing Experience Level: Beginner - Some stuffed toy sewing experience best.
Size Range: N/A
Special Techniques: Turning, stuffing and sewing small doll parts.
Pattern Format: PDF
Materials Used: Cotton woven prints and solids, safety eyes, plastic snaps, felt, polyester stuffing.
Personal Notes: Adorable and easy to follow pattern! This is a favorite stuffie of everyone that sees it and I expect to sew it again and again!
Photobucket

Friday, June 21, 2013

Pattern Review - The Buttons & Buckles Shortalls by Fishsticks Designs

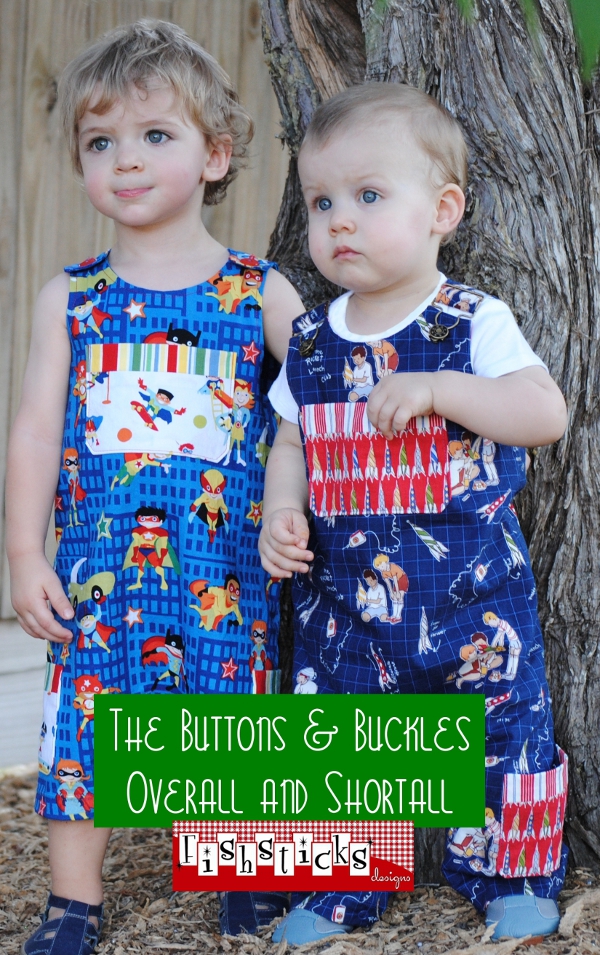
 This adorable FAMILY project finish is for the youngest of our bunch. He's outgrowing all of his summer clothes already and it just got here! These were made using the Buttons & Buckles Overalls & Shortalls pattern by Fishsticks Designs. I started out with the intent of making just one of these little shortalls, but then the elephant print fabric arrived the day I was cutting and well.....I thought it was just perfect for this pattern!  So, our lucky Lil' Man has 2 super cute new outfits....with room to grow. :)
 The pattern goes together easily following the step-by-step instructions and photos included. Provides a clean and professional finish as well. I listed it as an "Intermediate" level pattern because the facing for the chest/shoulder area and the inseam snaps do require a little extra patience and garment assembly experience to get just right. 
I love the look of the little pockets and the opportunity to use coordinating fabrics. This sweet elephant and red swirl fabrics are part of the Bungle Jungle collection....a current favorite of mine! 

Being that the pattern is designed for little ones 4 and under, I LOVE that it includes a snap inseam. This of course makes for easier diaper changes....a MUST! I used plastic snaps for both the inseam and the shoulder straps. The pattern additionally offers instructions for button/button holes or buckle strap closures and snap tape for the inseam, so you can choose your preference and customize your sewing project. 
Find the pattern in the Fishsticks Designs pattern shop here

SUMMARY
Sewing Experience Level: Intermediate
Size Range: Newborn - 4T
Special Techniques: Adding facing, snaps/snap tape, buttons/button holes, buckles.
Pattern Format: Paper or PDF
Materials Used: Cotton woven prints (Hellicopter print is from the Scoot collection and the elephant print from Bungle Jungle), plastic snaps for closure (KAM snaps from Assunta Store)
Personal Notes: Absolutely adorable outfit! This pattern offers lots of variations and is practically wearable for little ones. This is an "all seasons" pattern too with the shorts/overalls options, and can be worn with or without a shirt. 

Photobucket

Wednesday, June 19, 2013

Fishsticks Designs PDF Pattern GIVEAWAY!

How about a PDF pattern bundle giveaway perfect for FAMILY project sewing???
That's what I've got from Fishsticks Designs to offer 2 lucky folks today!

The 2 lucky winners of this giveaway will get to pick their 3 favorite Fishsticks Designs PDF patterns! Fishsticks Designs patterns are not only professionally written and drafted, but they are all the most comfortable and wearable clothing designs you can find! And for the WHOLE family! :)

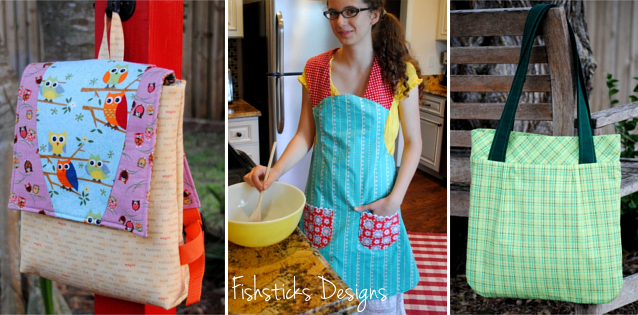
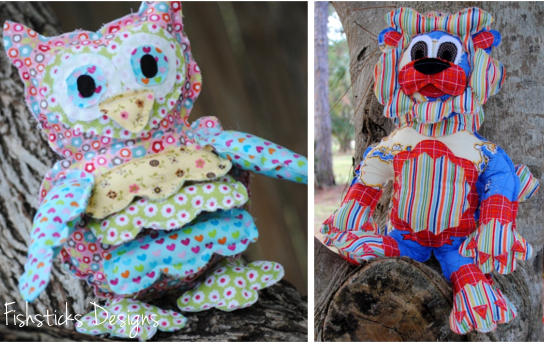
See some of my Fishsticks Designs creations here...
....here....
....and here.

Now....on to the GIVEAWAY!
To enter, simply follow the Rafflecopter prompts below. Open to all eligible.
Winners will be announced here and emailed and asked to respond within 48 hours to claim their prize.

Good luck to all!
And a warm THANKS to Fishsticks Designs for your generosity and super cute sewing patterns!!


Photobucket

Monday, June 17, 2013

FAMILY Guest Post - Bonnie from Fishsticks Designs

I'm delighted to have Bonnie from Fishsticks Designs here to share a very special FAMILY post today!


 Hi, Everyone! I am so excited to get to visit Hopeful Threads today. I have gotten to know a lot of you already through the projects that I’ve worked on with Kristy, and I am in awe of your generosity. I wish I could invite you all over for dinner and fellowship . . . and lots of sewing, of course! Wouldn’t that be fun?
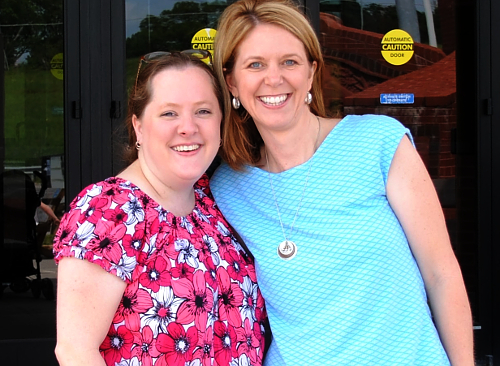
Did you know that I actually got to meet Kristy in person last month? My family and I took a little trip up north to visit my mother-in-law in West Virginia, and I snuck away with three of my children for a day. We met Kristy and her little ones for a museum visit and lunch, and we all had so much fun!
 
 I love that Kristy plans one month each year to encourage us to create specifically for our own families. I sew for my family almost every day, but, because I design sewing patterns for a living, I find that I easily fall into the rut of only sewing for business purposes instead of taking the time to focus on things that my family could really use or would really love. It’s good to regularly step away from outside responsibilities and remember that making memories with and for our families is far more important.
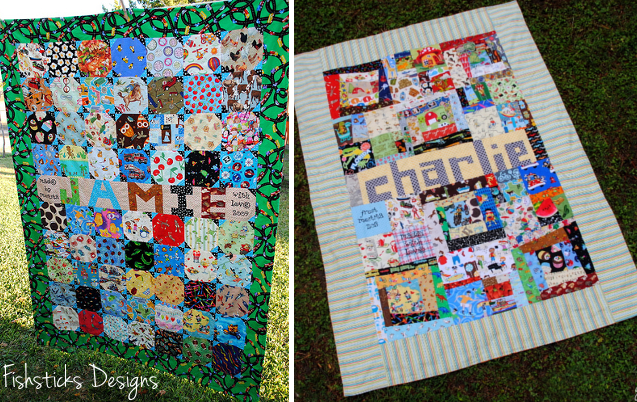
When I first started sewing for loved ones many years ago, I sewed really basic, simple quilts. I did so with the thought that I was creating something that would be enjoyed by the receiver, as well as something that would outlive me, something that my great-great-grandchildren would cherish because it was made with love by my hands. I was often frustrated, though, by mistakes that I made or little imperfections that made the perfectionist in me twitch a little.
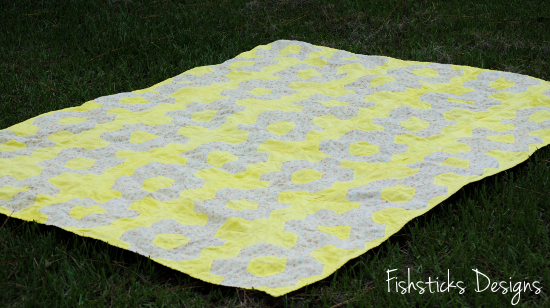
 I have fond memories of the things my Granny sewed for my sister and me growing up. We had gorgeous handmade dresses and beautiful quilts, piles and piles of quilts. My Granny went to be with our Lord about 16 years ago now. Sadly, in my not-so-responsible younger days, I let most of those irreplaceable quilts slip out of my hands. (I have tears in my eyes now just thinking of how much I wish I’d realized then what it would mean to me now to have those back.) I do have this one yellow quilt that my Granny made for me, though.
 
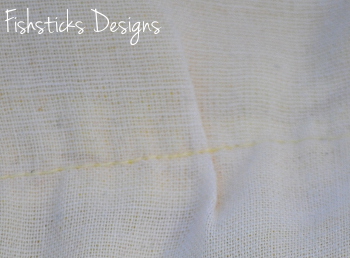
 I don’t even remember when I received it – it feels like I’ve had it forever. I’m sure that I’ve looked at it hundreds of times and always thought it was perfectly constructed. It’s funny, though that as I was curled up under it one day, I happened to look down at a part of the back that was flipped over towards me, and I was surprised to see a little pucker in the quilting.
 
 In that little moment I was overwhelmed with the realization that this quilt was lovingly created by a real person. It wasn’t a product of a factory or an assembly line, but the work of the hands of someone who loved me and poured that love into this simple yellow quilt. We’re all beautiful and imperfect and life is beautiful and imperfect, and in that little imperfection, I found a lesson in letting go of the need for absolute perfection, for the sake of future generations.
 Don’t get me wrong. If you’re sewing to sell or sewing for competition or sewing for a living in any way, you simply must strive for flawless work, and, of course, I think we should all be working on improving our skills each time we sit down at the sewing machine. You don’t want to spend time sewing something that falls apart before it has time to even be passed down. I’m always going to correct any mistakes I make when sewing clothing simply because I want the recipient to want to wear it. It’s different, though when I’m working on a quilt or a stuffed animal, for example, for a loved one. I try to not be quite so quick to grab that seam ripper. I think those simple little imperfections give life and character to my work. It’s like leaving a story behind for future generations.

Thanks Bonnie, for sharing a glimpse into your home and family with us!
Photobucket
Related Posts Plugin for WordPress, Blogger...