Showing posts with label pattern review. Show all posts

Friday, May 29, 2015

Beautiful Ballerina Dolls! Pattern by Blue Whimsy

 These lovely girls have been in the works for quite a while!
I tend to sew in "batches" when I'm working on items to donate, and sometimes....well, sometimes, I end up on a roll while I'm cutting and lose count on how much I'm going to have to sew. That kinda happened with these girls, so it has taken a bit of time to finish them, but I am tickled with how they've turned out!  
Each one has it's very own style and personality!

This is the Nora Ballerina pattern from Blue Whimsy.
I entered a giveaway that she had going on, knowing that these sweet girls would be perfect for our FLUFF Project. Before the giveaway was even over, she contacted me and told me that after reading about the FLUFF Project, she would like to offer me any pattern of my choice from her shop! Her kindness and generosity really touched me and I was so excited to get to sew this sweet pattern!

These are the ones that will be donated....
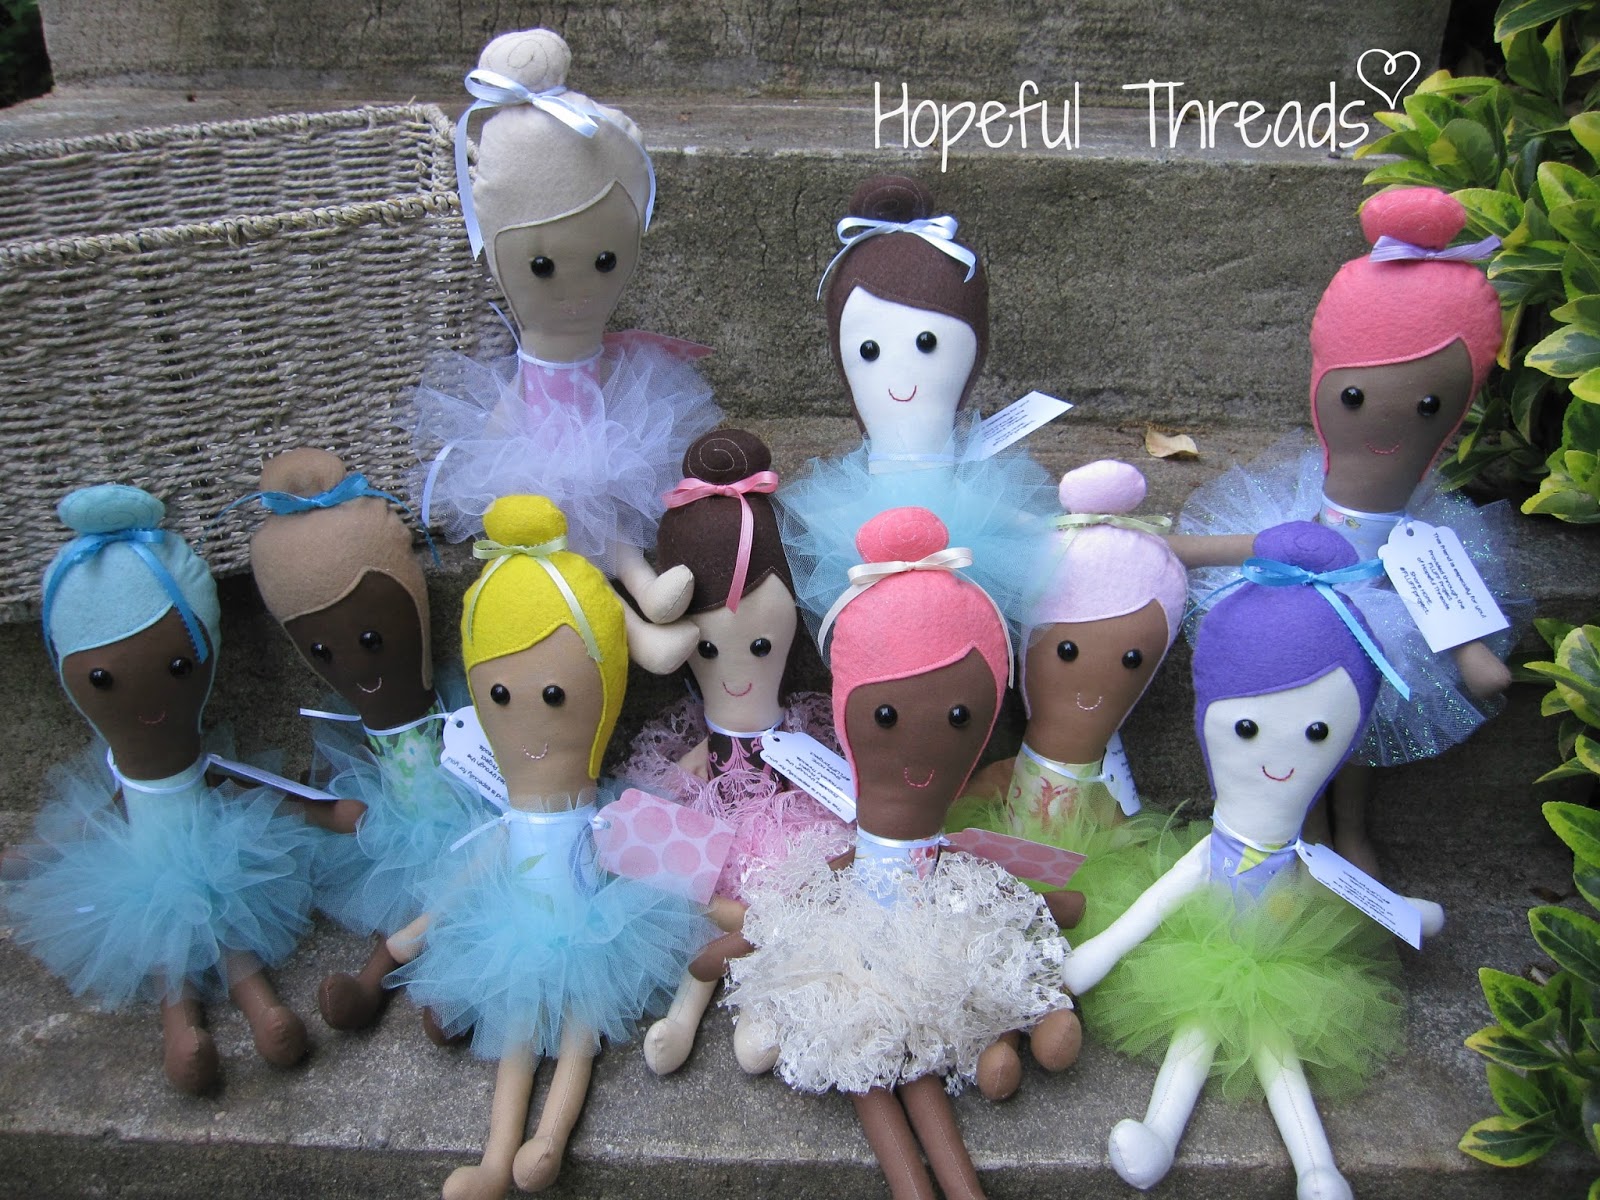
 And these I will be offering for sale to help off set the cost of time & materials...
You can find the ones available for purchase HERE!

The pattern also includes sweet little felt ballet slippers, but I chose not to add those due to the likelihood of them getting lost while in the donation shuffle.

The tutus are absolutely my favorite part!!!! They fluff up so darling!
This was a really fun pattern to sew! I loved watching them come to life through the process.

I made a simple change to the final assembly of the doll to make turning easier for me. The original opening for turning is on the dolls back, as you'll be able to see in one of the below pictures. However, I think I made my openings too small, and I struggled to get my first doll turned. And since I sew each step in an assembly line fashion when batch sewing, that meant they were all like this. So, here's what I did as an alternate way to finish....in case you find yourself in the same predicament! ;)


Adjusting the needle to the side, stitch 01 in the image, allows for an easier and more precise stitch along the edge. I used this stitch for much of my dolls assembly.

I attached the arms, and then sandwiched them inside the 2 body pieces, sewing from one bottom edge to the other, leaving the bottom open and legs unattached. 

 After trimming and turning the body, I turned under and ironed the bottom edge and pinned the legs in place. 

After sewing in place, I was then able to stuff the doll from the original opening in the back.  
This is a lovely pattern, one I definitely will sew again! The dolls are already drawing quite a bit of attention from all my friends and family who have seen them! 

You can find Blue Whimsy in all your favorite places....

Oh....and if you'd like to try one of her patterns for FREE, she has a darling little mermaid pattern HERE so you can! :)

Be sure to tell her you saw her sweet pattern here when you drop by to check out all her other sewing sweetness, so she knows just how much I appreciate her generosity! 
Photobucket

Saturday, October 11, 2014

Pattern Review - Rose Red Woodland Doll by Lella Boutique


May I introduce you to Little Rose Red. 
This sweet pattern comes from Lella Boutique and is the latest sweet stuffed friends I have sewn for our FLUFF Project. 
As with all our FLUFF Project donations, these five little darlings will soon make their way to five special children currently in foster care. 

I can't say enough good things about this sweet pattern!
The pattern pays close attention to detail, which is clearly evident in the construction and personality of your dolls as they are coming together. Well written instructions with illustrations make it a very straight forward pattern to follow. In addition to the sweet doll herself, the pattern includes a removable cape and skirt, so your dolly could easily have a full wardrobe of interchangeable outfits! I chose not to include the cape/skirts with mine since there is risk that they could become separated from the dolls on their journeys to their new homes. 

The pattern calls for a painted face, but I've not much experience with fabric paints for dolls, so I chose to hand embroider the faces on my dolls with french knots for the eyes and simple satin stitching for the mouths. I also used wool flannel for the hair since it was what I had available, and loved the soft texture it provided.
You can find the pattern in both PDF and paper formats in the Lella Boutique shop HERE. One thing she offers that I haven't seen very often, is the option to get BOTH the PDF and paper pattern for only $2 more than buying either of the options separately. I think this is such a great idea!!! This way I get the best of both worlds for a very reasonable price! I love the convenience of PDF patterns and the ease of printing and re-printing pattern pieces, but I must admit, I am a tangible girl. Having the instructions fully laid out in front of me on my work table is definitely my preferred way to work. 

A very warm THANK YOU to Vanessa of Lella Boutique for very generously sending me this sweet pattern in both formats. When I shared with her about the FLUFF Project, she thought it sounded like a great cause and didn't hesitate to show her support. I am so very grateful and know those that receive these sweet dolls will love them! 
Rose Red Woodland Doll Pattern by Lella Boutique
Oh, and don't you just adore the fabric used on the pattern cover!?!?! The print for the dolls hair couldn't be more perfect! This fabric is from the collection Into the Woods, also by Lella Boutique for Moda. The whole collection is beautiful and currently available in multiple colorways....you'll want to search your favorite fabric shops for it!

SUMMARY
Sewing Experience: Confident Beginner with doll making experience
Size Range: N/A
Special Techniques: Sewing, turning and stuffing small doll parts
Pattern Format: Available in both PDF and Paper
Materials Used: Cotton woven prints, wool flannel for hair, floss for facial feature embroidery, Fairfield World polyester stuffing.
Personal Notes: Darling doll that I will definitely sew again! I will adjust placement of the arms a little lower next time to allow them to lay more smoothly, by placing them completely below the shoulder curve.

These sweeties are the 1st for our next delivery box.....which is a little EXTRA exciting!!!!! When we make the next delivery, we will have delivered OVER 1,000 stuffed friends for children in foster care!!!! Unbelievable!!!! And still, going strong! Thank you all so much for caring for some many in this meaningful and loving way. It matters. So much!

Learn more about the FLUFF Project and how you can participate by clicking the image below.
Photobucket

Monday, June 23, 2014

Pattern Review - Hugh Manatee by Lindsay Sews

Couldn't wait to share this fluffy fella with you!
This is Hugh Manatee, the recently released pattern from Lindsay Sews. Lindsay generously sent him over for me to use for the FLUFF Drive and I'm so glad I got to make a couple! They were a lot of fun and turned out so cute!

 Mine were made from a blue-gray anti-pill fleece. I used pre-cut wool felt circles for his eyes, but you could also embroider them, use safety eyes or of course, cut your own from fabric. The sides of his mouth are stitched down to give him that pouty face of a Manatee. This is a large plushie and measures near 24" finished.

These guys got a good test squeeze from my Lil' Guy before making their way to our FLUFF Drive pile. They totally passed the test too, just so you know. ;)

Follow Lindsay on her blogs, Lindsay Sews and Craft Buds for lots of creative inspiration.
Find the adorable Hugh Manatee pattern HERE.

SUMMARY
Sewing Experience Level: Beginner
Size Range: N/A
Special Techniques: No real special techniques required. Very straight forward pattern with easy to follow photos.
Pattern Format: PDF
Materials Used: Fleece, embroidery floss, Fairfield poly-fil stuffing, felt circles for eyes.
Personal Notes: Fun & quick to make, and after my son got to test squeeze these, he decided that he need to have one added to his personal "for mom to make me" list. :)

See many more of my Pattern Reviews by searching "patter reviews" in the search bar to the right of your screen or my checking the (not yet updated) tab at the top of the blog. 
Photobucket

Friday, April 11, 2014

Pattern Review - Little Ninjas by Melly & Me

 This was some really fun sewing!!!!
I've had these adorably "tough" little guys on my sewing list for a good long while now. So glad to finally get to make them! This pattern is the Little Ninja pattern from Melly & Me and was generously gifted to me by the designer to use for the FLUFF Project. She was very kind and enthusiastically supportive of our outreach to children in foster care, and I am very grateful. Just look how sweet these fellas are!

The pattern is very straight forward, easy to follow and sewists of all experience levels will enjoy making these. I think the dolls are perfect for kids of all ages and have already envisioned a few in pink suits! ;) The 6 seen above are being donated as part of our Spring FLUFF Drive!

I had a really fun time picking the fabrics to use. The only variation to the original pattern was that I used pre-made bias tape for the head ties and belts. I also used safety doll eyes in place of embroidery just because I had some on hand. 

 One of these last 2 has found his place next to one of my sons and the other is a special gift.  

You can find the pattern in the Melly & Me shop here.


SUMMARY
Sewing Experience Level: Suitable for all skill levels
Size Range: N/A
Special Techniques: Sewing & stuffing small doll parts
Pattern Format: PDF or Paper available
Materials Used: Cotton woven prints, bias tape for trim, Fairfield World polyester fiberfil, safety doll eyes.
Personal Notes: Fun sewing project and adorable finish that little boys (and girls!) are sure to love!

Inching our way towards our 2nd Quarter GOAL!!!!!
Find out how you can join us and help bring smiles and FLUFF hugs to children in foster care HERE.
Photobucket

Monday, January 20, 2014

Pattern Review: Hooded Scarf by Whimsy Couture

I'm very thankful to Whimsy Couture for providing this pattern for me to sew for DCS this month!

I shared with you all the need for some kind of hooded towel or blanket needed for some children being treated for lice when they come into foster care. It's very cold here right now, and if their hair hasn't had a chance to fully dry, that means having to go out with a wet head....not so good. When I started looking about for patterns and ideas for what to sew that would be practical yet something the kids wouldn't mind wearing, I found the Whimsy Couture pattern. When I shared with Denise what I was working on, she did not hesitate a single moment to send over the pattern for me to use. She has always been so very generous and supportive of my efforts, and I am so very grateful!

Isn't this adorable!?!?!?!
This is the Hooded Scarf pattern from Whimsy Couture. 
And it's what I used to make a bundle of 15 Hooded Scarves for the children. 

Knowing that a little absorbency might help, I made mine of fleece lined with flannel. They were very quick and easy to make too!


The pattern provides variations for different styles and accents, along with step-by-step pictures for the entire sewing process. It also covers sizes from Baby to Adult, so you get all you need to sew for the whole family in 1 pattern!

And I think it sews up as perfectly for boys as it does for girls!

SUMMARY
Sewing Experience Level: The pattern is listed as an intermediate level pattern, but I think a confident Beginner would do fine with it too. The directions are very clear. 
Size Range: Infant - Adult
Special Techniques: Fleece ruffles.
Pattern Format: PDF
Materials Used: Fleece outer, flannel inner.
Personal Notes: I think this would be the perfect thing for the kids to wear after swimming during the cold months too. May just have to stitch up a few more for my crew now! :)
Photobucket

Monday, December 9, 2013

Pattern Review - Ellie the Baby Elephant, Wardrobe & Travel Case by Ruby Jean's Closet

Hold on to your hats, because your cuteness meter is about to blow it's top!!!
This is one insanely cute set by Ruby Jean's Closet and I'm so exited to share about it with you in time for Christmas sewing since it would make a perfect gift for any little love on your list! 

This is the Ellie Baby Elephant Doll, Wardrobe and Travel Case by Ruby Jeans Closet. Each of these patterns can be purchased separately, but once you see them, you're going to want them all! Ruby Jean was so kind and generous and sent the set over for me to sew up in support of the FLUFF Project. I have 2 more sweet Ellie's in the works right now for our next donation delivery. 

But of course, when my little Princess saw it, she really needed one for herself too. :) And just to go ahead and make sure we are all on the same page....our theme....PINK!!!! :D

 The sweet elephant doll is such a great size for cuddling! She comes with the patterns for bib and diaper you'll see below as part of the wardrobe, and also the little bow. I love the bow!!! Instructions are included for how to add a bit of velcro so the bows can be interchanged, but knowing my Lil' Miss and how things get lost, I opted to just put this one on a safety pin so that when it was "missing" it wouldn't look like our little friend had a bandage on her head. ;) Maybe when she's a little older we can revisit the interchangeable bows, as I think that is such a fun idea!

When open, the Travel Case serves as Ellie's home. One side has her dresser that INDEED holds her clothing.... 
 ....while the other side is her bed. Seriously.....you think it can't get cuter already don't you!?!?! Well just wait, it DOES!!!!

When ready for on the go, Ellie and all her goodies tuck neatly inside and zip up in this very sturdy and attractive Travel Case. 

You are loving her as much as I am aren't you??? :) Well get ready for her fashion show, because now it's time to share her Wardrobe!

Of course we have the Twirl Skirt with coordinating Bow that you have seen....

Then she has this darling Pillowcase Dress that can be made in 3 lengths for a top, dress or gown. Mine is made in the gown length. I think I'll have to make my Miss a matcher soon! :)
 And OH MY!!!! What about these PJs!?!?! I know! SQUEEEEEE!!!!
 Every Baby needs a diaper and bib, and I made mine out of soft flannel. 
 There are even more items in her Wardrobe that you can add too, and remember, all can be stuffed right inside her Dresser in the Travel Case for storage and easy "to go" play as well!

My verdict is TOTAL LOVE! I can't wait for my Sweet One to open this on Christmas morning and realize Mommy did make her one too! ;) She watches all my sewing and is always curious about which items will stay and which will be going. I've had to play this one off a bit. ;)

SUMMARY
Sewing Experience: Doll and Wardrobe are suitable for a confident Beginner Seamstress, Travel Case better for seamstress with Intermediate level sewing skills/experience.
Size Range: N/A
Special Techniques: Sewing a stuffed toy, applique, applying bias tape, working with elastic, inserting a zipper. 
Pattern Format: PDF
Materials Used: I have used all designer Cotton Wovens for my project with some fusible interfacing as noted in pattern. 2 zippers for case. Elastic for clothing. 
Personal Notes: LOVE! Love this sweet doll and all her trimmings! She is a doll I will make again for donation and love the dimension and ease of assembly the pattern provides.  
Photobucket
Related Posts Plugin for WordPress, Blogger...