Showing posts with label product review. Show all posts

Monday, August 3, 2015

I Made Shoes!!!

Have you ever made shoes??? I hadn't, but was so excited to give it a try! My friends at Dritz Sewing offered to send me one of their awesome new Espadrilles kits to try out and share my thoughts with you, and I'm thrilled to get to do so!

Aside from sewing baby booties, this was my first attempt at creating an actual wearable shoe. The packaging suggested planning 2 hours to complete the project, and I'd say that is reasonable. I finished in a bit over that, but I was sewing at a very casual pace while playing about the internet as well. :)
The instructions provided with the kit include step by step directions and illustrations that made the whole process very easy. The Espadrilles collection also includes a variety of notions designed specifically to assist in "shoemaking made easy".  While it isn't necessary that you purchase all the extra notions to create your own pair of Espadrilles, I'll share some of the ones that I thought made the process easier.
These glass head pins are one of the extra notions that I loved! They are a much sturdier pin which made pinning the fabric to the shoe sole easier and the strength of the pins kept them from bending.

Dritz Point Turners are one of my favorite sewing notions of all time, and it was a perfect tool for turning and smoothing the fabric before attaching to the jute sole. 
These handy Needle Pullers were GREAT for the blanket stitch process along the outer edge of the shoes. They provide a grip on the needle that makes pulling in through the thick jute and fabric easier. Prevents sore fingers too!

These shoes are so comfortable to wear! I was really pleasantly surprised at just how comfortable the jute was. And, there is a vast variety of sizes and color options to choose from.
Take a look at the selection on the Dritz website HERE. I'm kind of drooling over a bunch of them right now! All the kids have requested a pair of their own, so who knows, there may be a bit more Espadrilles sewing in my future!

 And one of my favorite things.....the bobbin tread! Isn't that great!?!?!?!

Pleased with the results and proud to say I have now made shoes!!! Too cool!
What about you? Have you made shoes? What did you think?

**Materials provided by Dritz in exchange for honest feedback. All opinions are my own.**
Photobucket

Wednesday, October 9, 2013

Product Review - Better Bobbin Thread Winder

I recently had the opportunity to try out the Better Bobbin Thread Winder. 
It's a handy little gadget used to refill your bobbin without having to unthread your sewing machine. Let's take a closer look....

 When your bobbin is ready to be refilled, you simply remove it from your machine. With the presser foot of your machine raised, and leaving your machine threaded, following the step-by-step number guide on the top of the winder, slip your thread end through step 1, around step 2 and then through the hole in your bobbin just as you normally would to refill it. Place your bobbin on the winder at step 3. Then flip the "off" lever against the empty bobbin and press the black button to start the winder. 
It's FAST!!!!!! I was surprised at how fast. 
In a matter of seconds, you will have a full bobbin ready to sew again and don't have to bother with re-threading your machine! I love that! :) When your bobbin is full, you simply pull the small blue lever back to the "off" position and cut your thread. 

This compact little muscle of a machine also includes a thread cutter that you can see on the top, and the lid includes a stand for a large spool of thread as you can see in the first photo, so your bobbin can be filled separately from your machine as well if you choose. 
 Quick Overview:
PROS: Very fast and easy to use. 
Saves time from having to re-thread your machine.
Compact for storage.
Long cord.

CONS: Doesn't shut off automatically when bobbin is full.
Doesn't seem to consistently get as even and tight of a wind on the bobbin as my machine does. 

There you have it, the Better Bobbin Thread Winder. 
All in all, a fun, little gadget that I have enjoyed using for sure!
Photobucket
*Disclosure - I received this product free of charge to try and share my opinion. No other compensation was received. Opinions shared are my own.

Wednesday, August 21, 2013

Product Review: Petite Press

 I recently got to try a Petite Press Portable Mini Iron and thought some of you might like to know about some of the great features it has. 

As you can see, it has a digital control pad on the top that allows you to adjust the settings to 4 different temperature ranges from 176-410 degrees. Yes....this little thing gets HOT!!!! We never had the settings at the highest temp and still got great results. The little light will let you know when it's ready, along with a beep, and it didn't take long at all to heat up. We first used it when my nieces were here, so we had 6 kiddos waiting to iron and sew, so that was kind of important! :)

The handle has comfort grips that also help you hold securely to the press while using it. 
It also has a stand that you can click down to prop the iron with the heated soleplate up when not in use.

I was VERY surprised and impressed with the crisp seam this little gadget created! No steam at all! 

 While I've only needed to use it with the head in the original position, the dial you see on the side allows the head of the iron to pivot and be secured in multiple directions. 

Another thing I really liked was how long the cord was....very, very long! Made it easy to use.
All in all, this is a product I was pleased with, will continue to use and was pleasantly surprised with how well it performed. It would make a great iron to take with you in your sewing bag for traveling or events outside of your home, and while I haven't yet used it for applique, I imagine it would work beautifully for that as well.
Thanks for letting me share! If you have any specific questions about it, I'd be happy to answer as best I can. Just email me! 

*I was provided this item free of charge. No additional monetary compensation was provided for this review. The opinions shared are my own.
Photobucket

Wednesday, June 12, 2013

Pattern/Product Review - Babyville Boutique Cloth Diapers Made Easy

 When this bundle of goodies arrived that Babyville Boutique sent me to use for one of my FAMILY projects this month, I was soooooo excited! I mean just look at all that cuteness!!!!

We use cloth diapers, and our Lil' Guy was ready for some new ones! I have sewn cloth diapers for years....it was actually kind of what started this whole Hopeful Threads thing if you haven't heard....but this was my first time using Babyville Boutique brand patterns & materials. 
 The book they offer, Cloth Diapers Made Easy, is true to it's title! It is packed with 60 pages of step-by-step instructions, full color photos and sewing tips and techniques throughout! 
Everything you could possibly need to get started with cloth diaper sewing! 

Also included are full scale patterns for 4 different diaper sizes.

There are multiple diaper types and variations, each that include a detailed supplies list to make prep even easier. 

And the fabric prints!!!!!!!!! OH MY GOODNESS!!!!!!!
Each one I started to sew was my favorite! :) They are all so cute! And this is a GREAT quality PUL (Polyester Urethane Laminate) that feels very durable and sews beautifully! 
(PUL is the waterproof fabric used in cloth diaper sewing)
 The Robot & Cowbaby prints are some of the newest boy prints available. 
How are you suppose to be able to pick a favorite???
 I made a turned and top-stitched version of pocket diapers for these. 
The image below shows the "pocket" opening in the back. This is where the absorbent insert(s) are placed, between the inner and outer layers. I chose to use a microfleece for the inside of my diapers, but there are a variety of other options shared in the Cloth Diapers Made Easy book as well.

I think I finally settled on this one as my favorite. Isn't is sweet? 
I love green, and am kind of partial to frogs and turtles anyway. But my! So cute!!!!
 And the cuteness doesn't stop with the fabric....nope! There are coordinating appliques, sew-on labels,   buttons, EZ Adjust tape, FOE trims (fold-over elastic) and even engraved snaps! 
 I made the size Medium for my Lil' Man. The weight range in the book says 18-28lbs., and the smallest setting fits my 18lb. Sweetie perfectly! He'll be able to wear these for a good long while too. 
Eeeeek! Look at those squishy thighs in that sweet diaper! :)

 Babyville Boutique also very generously sent along some of their gender neutral fabrics for me to sew some extra diapers for donation. These adorable diapers will be going to an organization that helps provide cloth diapers to families needing a little extra help getting started, The Rebecca Foundation's Cloth Diaper Closet. This organization is growing and hopes to be able to provide for more and more families. You can read more here. 

 I know I'm a label addict, but don't you love the sweet labels and polka-dot trim????

I had this mushroom FOE in my stash that worked perfectly on the red too. 
 These pictures show the hook & loop closure and pocket opening for this alternate diaper style.
"Who's Cute?" the little owl on the label asks.....the baby wearing this diaper is my answer!
 I had a great time sewing these and look forward to making more in the future.

A warm THANKS to Babyville Boutique for providing these adorable products for my project. You can learn more about Babyville Boutique products on their website here and their facebook page here. 
Photobucket

Sunday, October 30, 2011

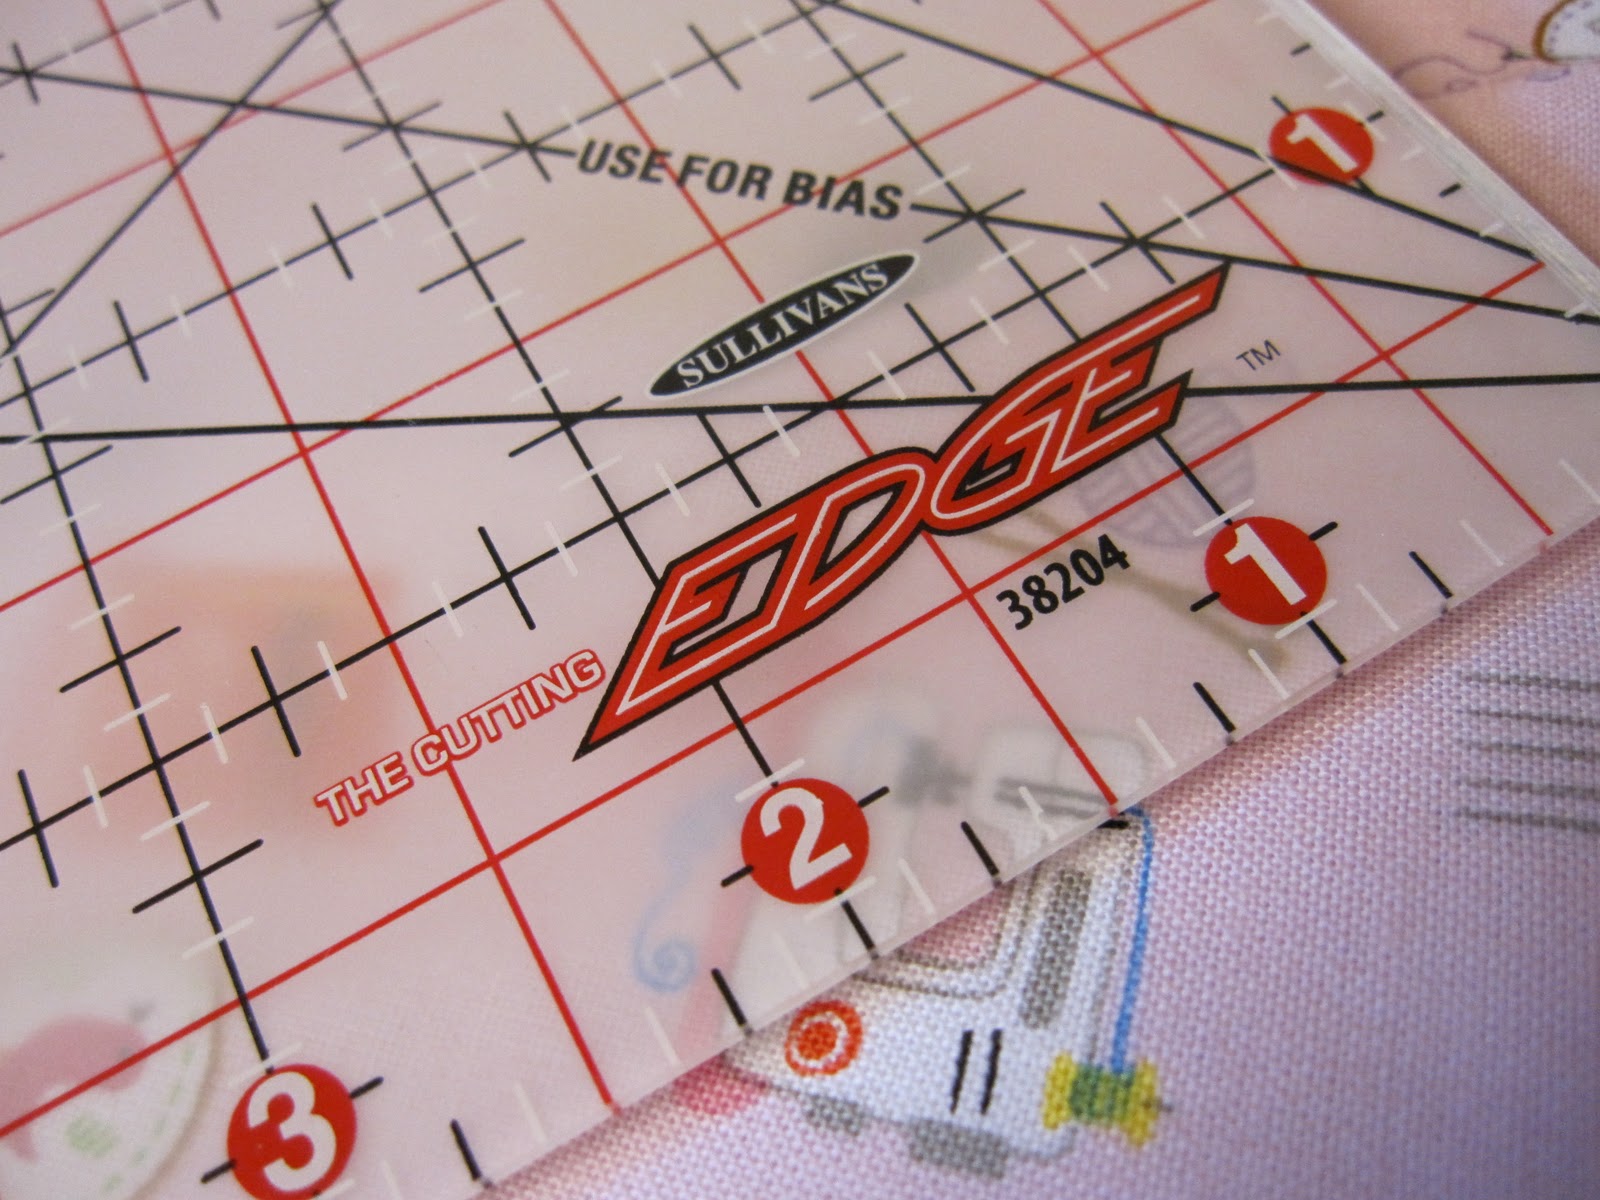
The Cutting Edge Ruler

I was recently one of the very lucky winners during The Cutting Edge Ruler blog hop and I love this thing so much, when she asked me to share what I thought about it with you, I had no problem!
I had been looking at rulers for awhile now, needing a larger size, so when I saw the blog hop giveaway going on, I jumped right on board! :) I also found some fun new blogs to follow too!

The rulers come in a variety of shapes and sizes, 5 squares, 4 rectangles and a yard stick. I chose the 6.5" x 24.5" which is so helpful for cutting full lengths of fabric! I had been using a 4" x 12" before, so you can image how much easier and more accurate this new ruler makes my cutting!

Here's the cool thing about the Cutting Edge Ruler that sets it apart from the others on the market...it sharpens your rotary cutter blade WHILE you are cutting! Yep! It has a diamond carbide edge along one side of the ruler that serves as a sharpener each time you cut using that side.
I've only been using mine for about a week, so I'll have to get back to you on how it extends the life of my blades. However, I can already say my blade is skipping much less since starting to use this ruler. I'm excited about the prospects, cause those blades are expensive!!!

While the special sharpening edge is a super cool feature that had me saying "Why didn't I think of that?" since it makes perfectly practical sense, not to mention delights this multi-tasking mama, the other thing I am absolutely LOVING about this ruler is the non-skid frosting!!!
No more crooked cuts and wasted fabric because my ruler slid!And you can still see through it to align the pattern of your fabric.

A big THANKS to the lovely Pat Sloan
Pat Sloan - The Voice of Quilting
 and Victoria of Bumble Beans Inc. whose delightfully quilty blog I won on!
Oh and just so you know, it's not all business with these incredible ladies....check out how they use their gifts and talents to give back in a BIG WAY!!! You can help too!

Thanks again ladies! I'm loving my ruler and love what you do for others too!

Related Posts Plugin for WordPress, Blogger...